Stellarium Instructions
Content
With the Stellarium software we provide you with a comprehensive online planetarium, which allows you to find any celestial body and of course your star in the sky easily. In addition, you are completely independent of the year, daytime and weather. By entering the correct parameters, the observation can be done easily and quickly at any time. You can also customize the location, date and time to display the starry sky the way you see it, for example, at the baptism date of your star or from a specific location.
Installation of the software
Please download the Stellarium software for your operating system with a left click on the corresponding link:
In the window, that opens, select the location for the download and click “Save”. The software will now be downloaded to the selected folder. Please follow the instructions now according to the operating system you are using.
Installation on Windows
Once the download is complete, open the file with a double click. Depending on the operating system, you may need to confirm with "Yes" that the software may be installed. Then select your language and confirm with "OK". After that a welcome window will open, where you can start the installation with "Next".

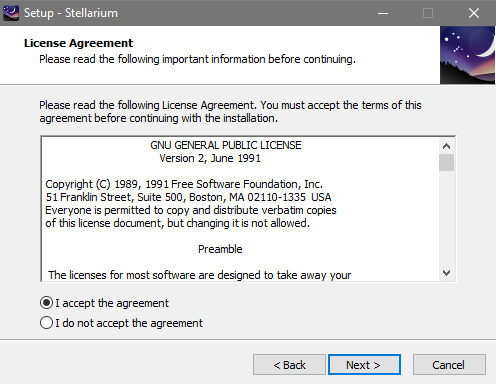
Accept the license agreement and click Next.
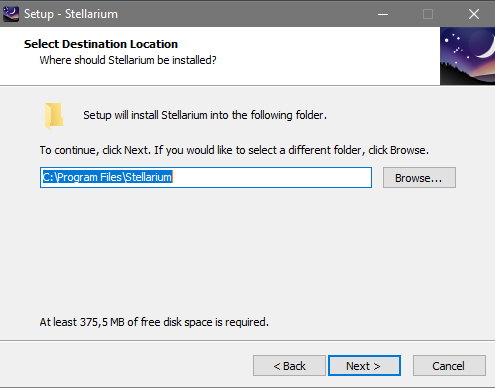
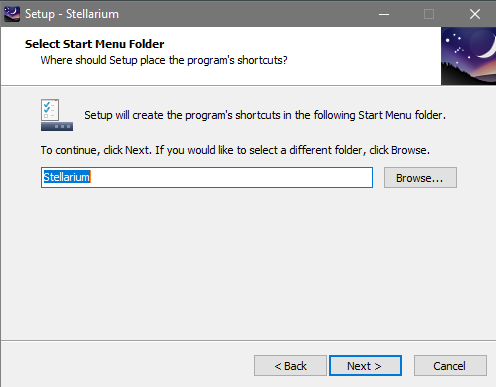
First select the folder, where you want to install the software, then the location and name for the program shortcut and click “Next”.
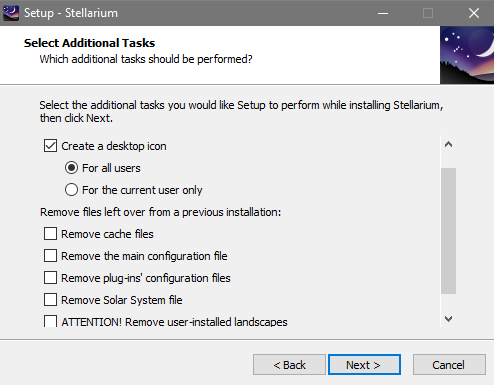
In the following window you can remove data from previous installations, if necessary. If you install the software for the first time, simply click on "Next" and start the installation by clicking on "Install".
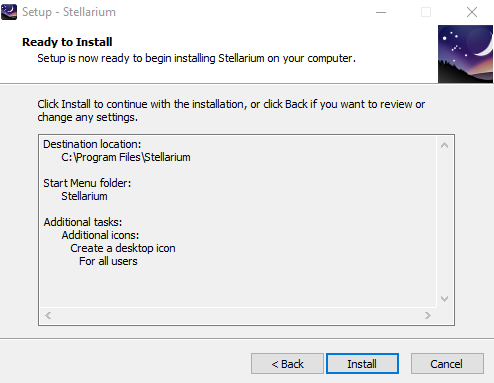
At the end of the installation a window opens from which you can then start the software directly by clicking on "Finish".
Installation on Mac OS X
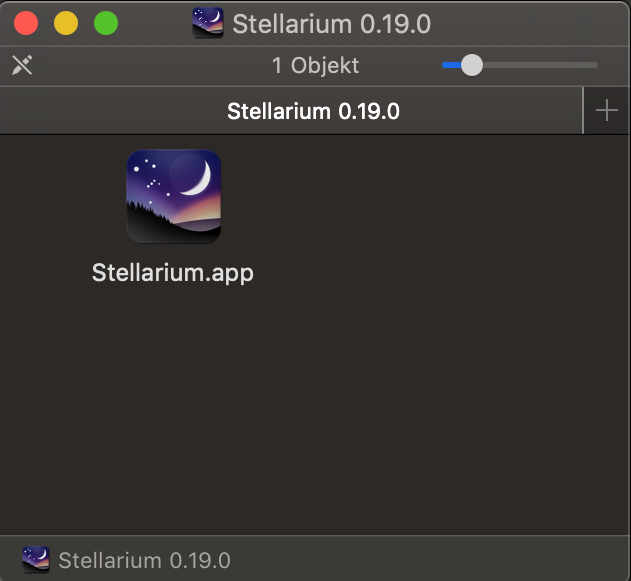
Once the download is complete, double-click on the .dmg file. A new window opens with the Stellarium app. Move the Stellarium app to your "Applications" folder or any other location on your hard drive. By double-clicking on the icon of the Stellarium app and confirming the security note with “Open” you start the software.
Basic operation and setting of the software
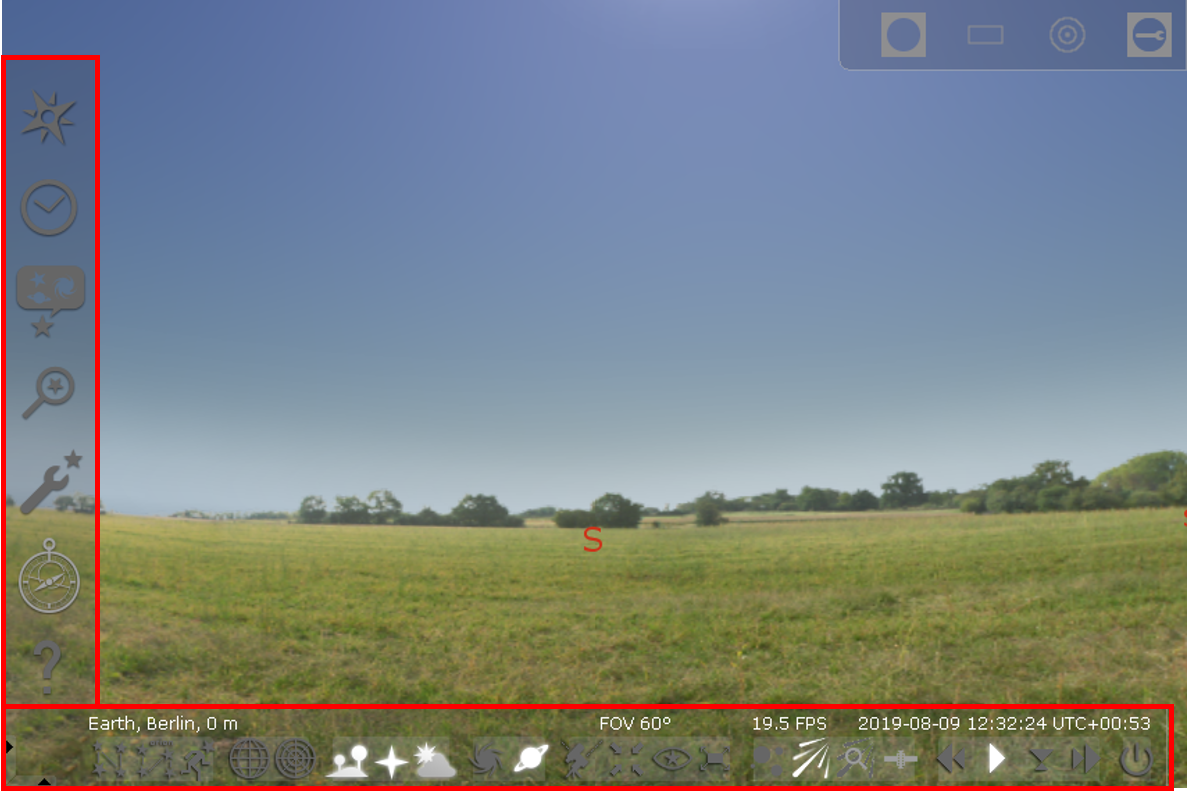
When the software opens the view will start on a landscape using the location, date and time from the current information on your system. These are displayed at the bottom of the screen.
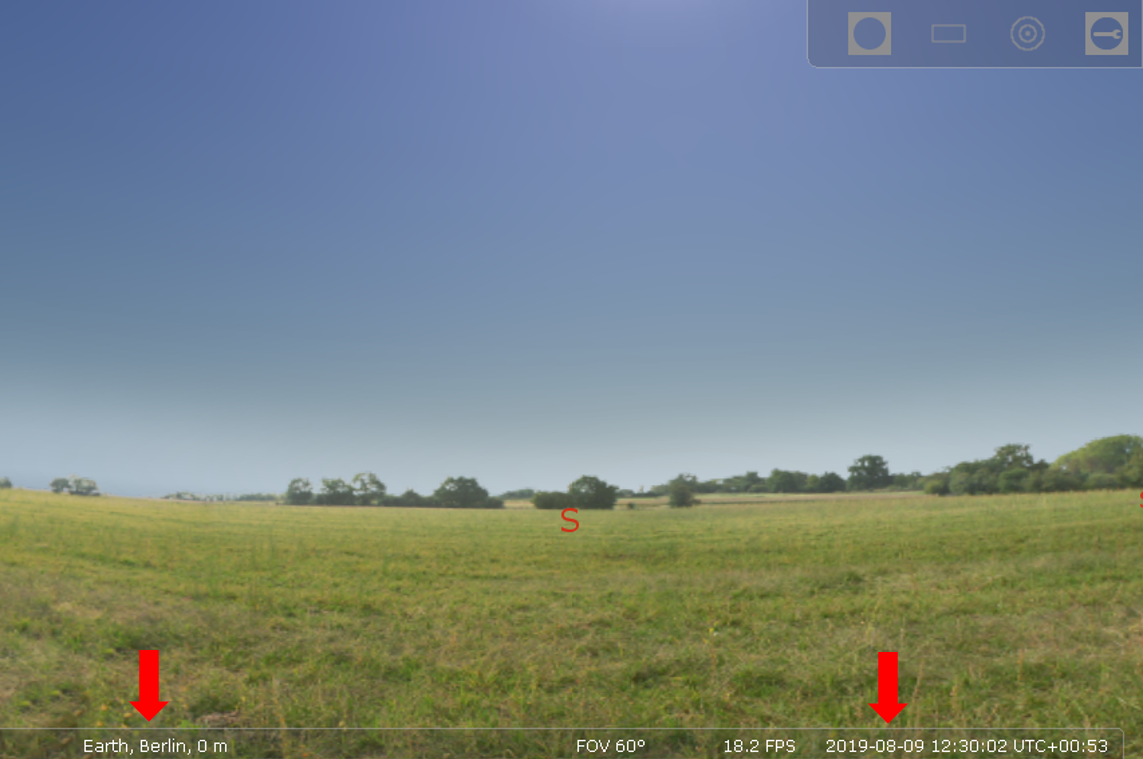
You can change the view and perspective by clicking anywhere in the image with the left mouse button, then holding down that button and moving the mouse in the desired direction. Alternatively, you can use the arrow keys on your keyboard.
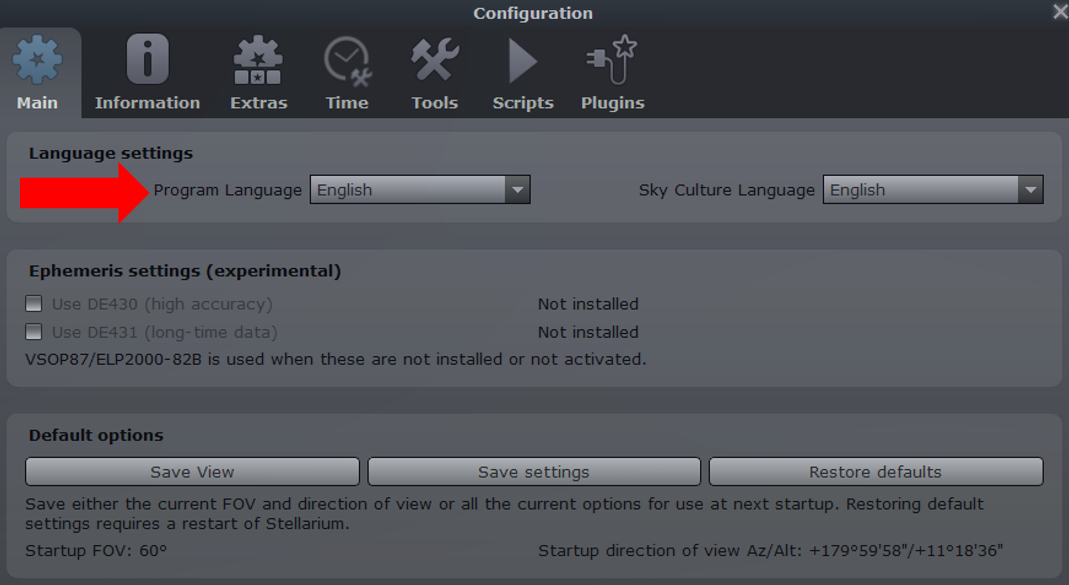
The software is usually executed in the language that was selected during the installation or is set in your default settings. If you want to change the program language, press the F2 key and select the language you want under "Language Settings". Then close the window by clicking on the "X" in the upper right corner of the window or pressing F2 again.
You can now make other desired settings by moving the mouse pointer to the lower left corner of the screen. Then two menu bars are automatically displayed, which contain all menu items of the software. If you move the mouse pointer over the individual menu items, short explanations are displayed.
You can either click on the menu items directly as soon as the menu bars are displayed or alternatively use keyboard shortcuts. In the following you will find an overview of the most important keyboard shortcuts, that we use again and again in the text.
Overview of the most important keyboard shortcuts
| F1 | Help window |
| F2 | Configuration window |
| F3 | Search window |
| F4 | Sky and viewing options window |
| F5 | Date/time window |
| F6 | Location window |
| F10 | Astronomical calculations window |
| F11 | Full-screen mode |
| B | Constellation boundaries |
| C | Constellation lines |
| V | Constellation labels |
| R | Constellation art |
| G | Ground |
| Q | Cardinal points |
| A | Atmosphere |
| Alt+P option+P |
Planet labels |
| Ctrl+N cmd+N |
Night mode |
| Ctrl+S cmd+S |
Save screenshot |
| Ctrl+Q cmd+Q |
Quit |
View / Find celestial bodies
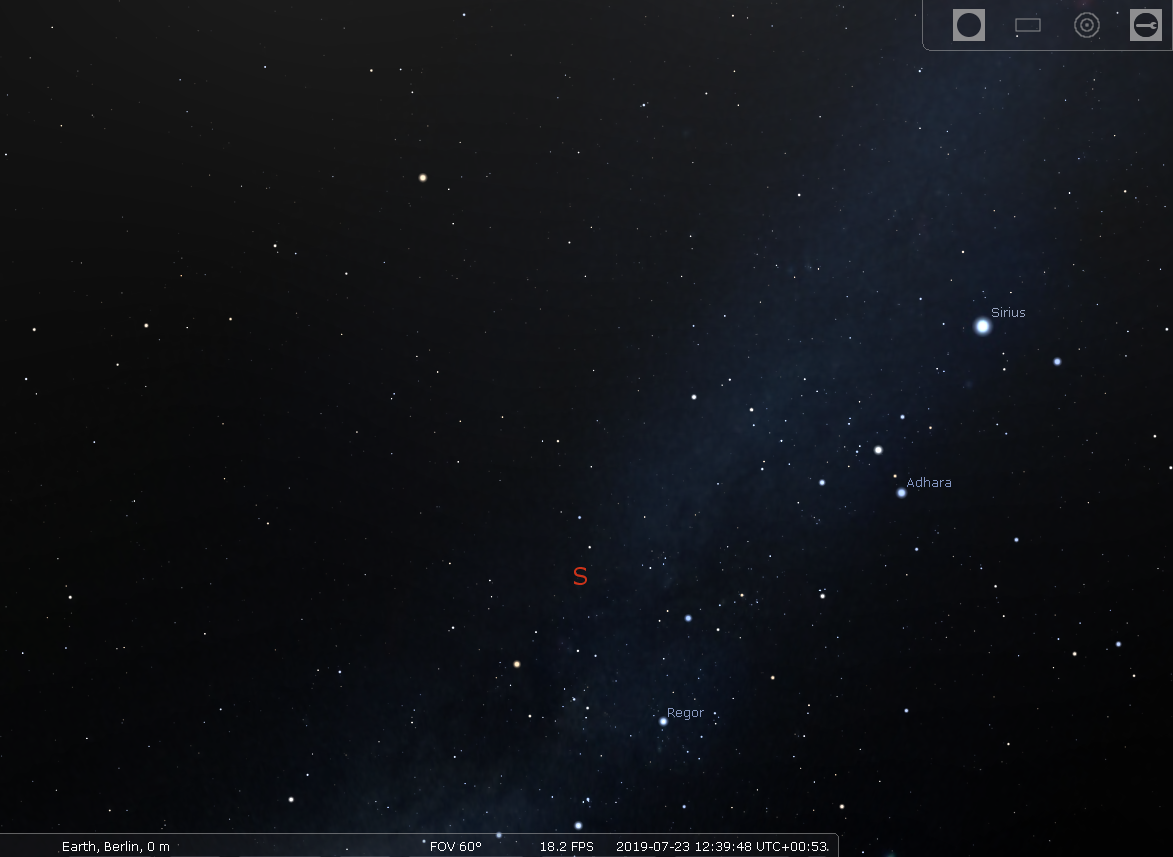
In order to see celestial bodies, the first step is to turn off the Earth's atmosphere by pressing the A key. You can see the starry sky and the ground now.

Press the G button to turn the display of the ground off, so that you see only the starry sky at your current position.
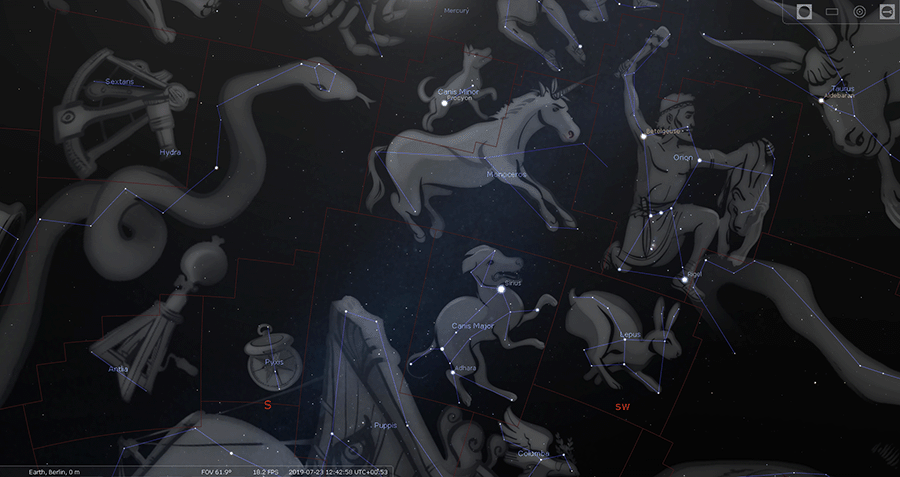
For better visibility of the constellations we recommend to switch on the following details by pressing the associated keys:
Constellation lines (C), constellation boundaries (B), constellation labels (V), and constellation art (R).
Now, the constellations are labelled with their names and highlighted by blue connecting lines between the individual stars as well as graphically. The red lines show the respective constellation boundaries.
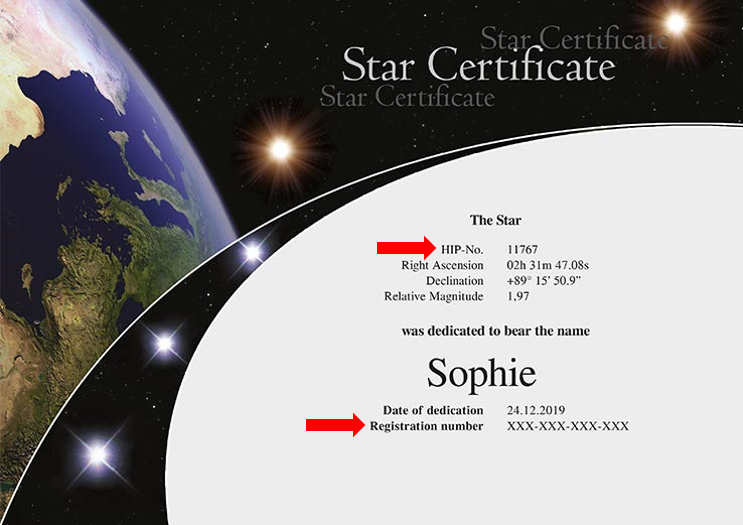
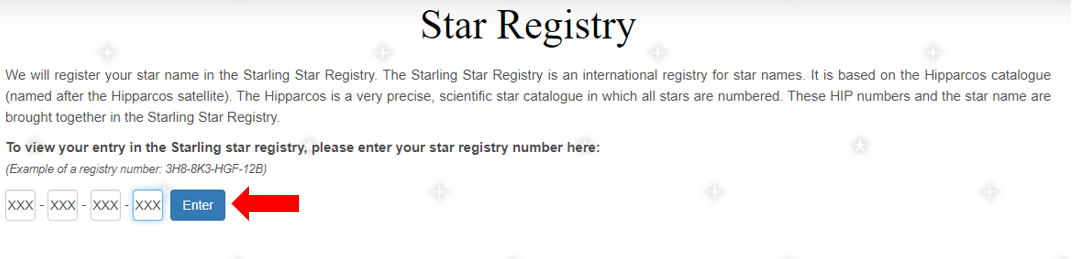
If you want to display your baptized star now, the easiest way to find it is to enter the star’s HIP number from the Hipparcos-Catalog. In this internationally recognised scientific star catalog all celestial bodies are uniquely numbered. Thus, every star registered in the Starling star register also has a HIP number. You can find it either directly on your star certificate or you can also look it up on our website under the link Star Registry by entering your Starling registration number.
If you have the HIP number of your star, you can open the search field for celestial bodies (F3) in the Stellarium software and simply enter the HIP number of your star in the search field under "Object". Then click on the magnifying glass. Make sure to always use the abbreviation "HIP" in front of the number, otherwise the software will not be able to find the star!
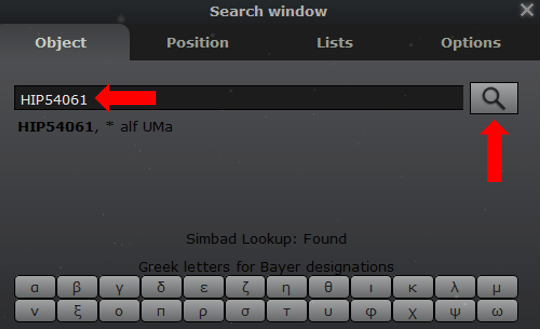
The view is automatically centered on the star then and displayed with different details. If you scroll with the mouse, you zoom in or out. You can also view the details for any other celestial object by clicking on it with the left mouse button. If you don't want to see any more details, just right-click once on any point.
It is possible to save an image of the current view from the Stellarium software at any time. Simply press the key combination Ctrl+S or cmd+S. The screenshot is then stored directly on your computer in the "Pictures/Stellarium" folder.
Make settings for date, time and location
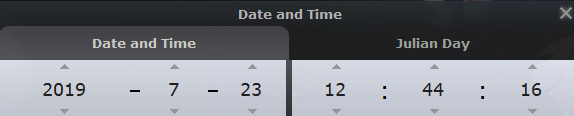
If you want to know what the starry sky looks like at a certain time, such as the baptism date of your star, this is also possible with the Stellarium software without any problems. To do this open the date/time window (F5) and set the desired date and time. The display of the starry sky updates immediately after entering the data. When the date and time are set as desired, close the window by clicking on the "X" in the upper right corner. If you want to set the display back to the current date and time, simply press the number 8 on your keyboard. The display then adjusts automatically again.
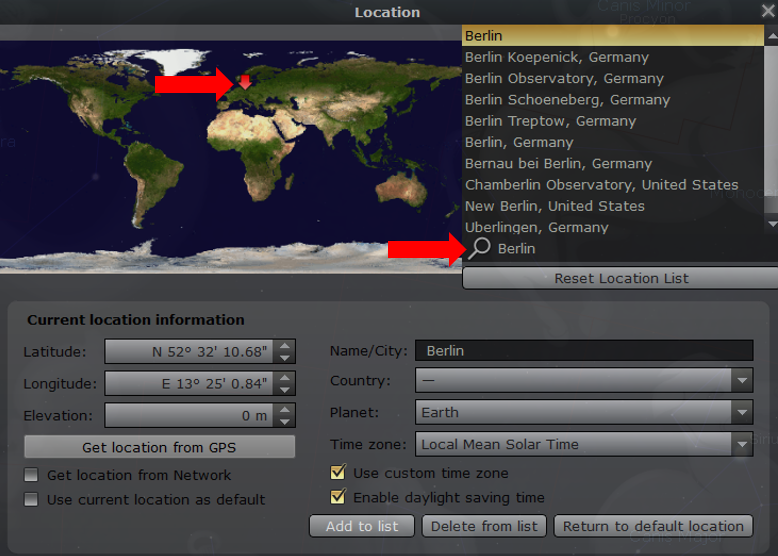
Maybe you are giving away the star baptism in a special place and want to see the starry sky and your star from this position. Then you can use the location window (F6) to display the view of the starry sky from any location. To do this enter the desired location in the search field next to the magnifying glass and then select it from the list displayed above. The perspective changes as soon as the location is selected from the list. If the location you are looking for is not included in the list, search either for a larger city in the area or the capital of the respective country and select it. The perspective changes only minimally. For example, it makes little difference whether you look at a star from Berlin or Rome.
You can also click anywhere on the displayed world map and the view will change accordingly. If you want to return to your starting point, enter it again in the search field next to the magnifying glass and then select it from the displayed list. Close the window by clicking on the "X" in the upper right corner or press F6 again.
This guide discussed the installation and basic features of the Stellarium software so that you can quickly find and display your star. If you have further questions about the program operation, you can always contact our customer service by Email.